
How To Install Post & Rail Fencing
A step-by-step guide to DIY-install a morticed post & rail timber fence
Step 1: Tools
You will need the following tools to set up your 2 rail fence or 3 rail fence:
Auger or bobcat to drill the post holes
Spray mark (for marking post holes on the ground)
Crowbar
Spade
Tape measure
Stringline
Level (600-1200mm long)
Pencil
Hammer
Small nails (for mounting stringline)
Chainsaw or power saw (for trimming rails)
Plane (makes installing any rails on undulating ground easier)
Bagged concrete (1 bag per post, we use Bastion Quik Set available at Bunnings)
Water (for concrete)
Drill
Bugle-head batten screws
Step 2: Prepare the site & check for services
Clear the area where the fence is going from any existing fencing, shrubs and trees.
IMPORTANT! Check the location of ALL services to the property.
This can be done by lodging a dial before you dig. Google ‘dial before you dig’, and choose the appropriate service based on your state. If in doubt as to service locations you can get a registered service locator to locate and mark the location of your services.
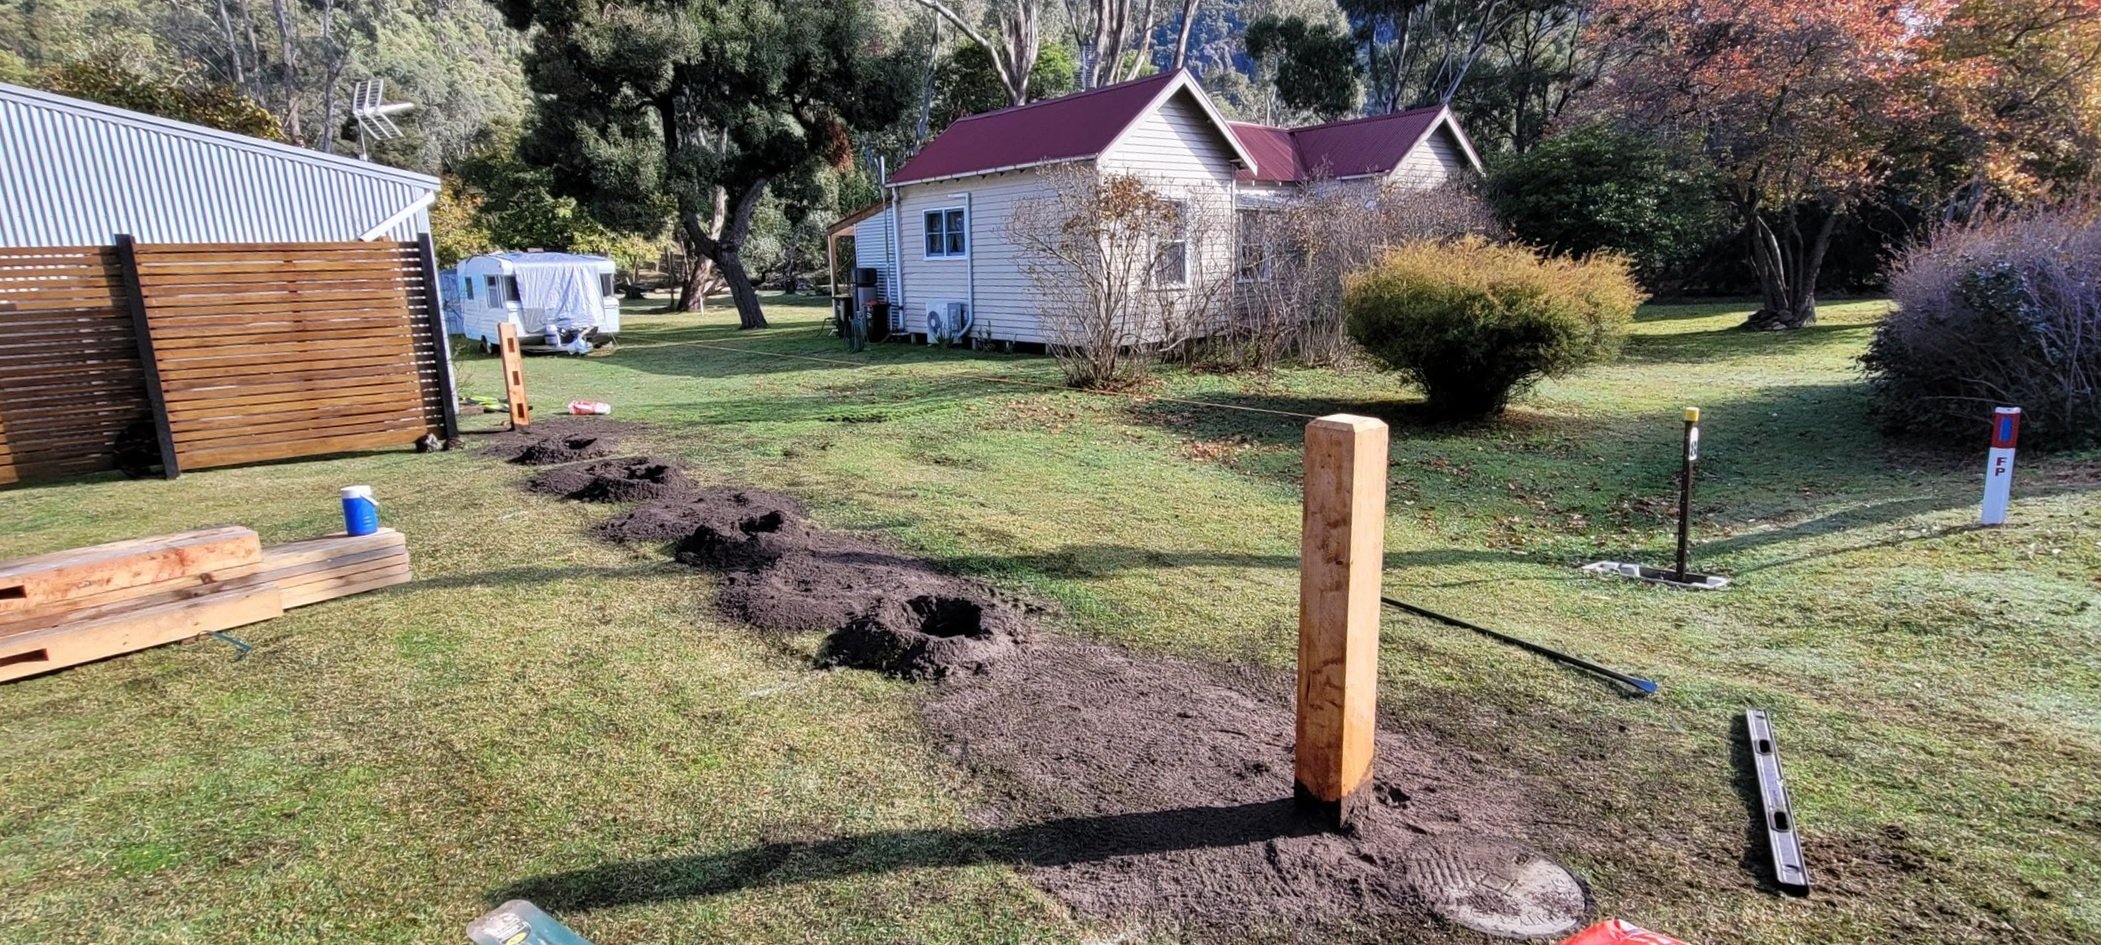
Step 3: Mark out for post holes
Setup a string line along the line where you would like the fence to go (this string line will be the centreline of the fence)
Using a tape measure, measure the total length of the run of fencing you wish to do
Work out how many bays of fencing you require to cover that length of fencing, especially for larger runs of horse paddock fencing.
Double check the materials you have are enough to cover that distance
You are now ready to work out your post spacings and mark out for the holes
Divide the length of the fencing by the number of bays you are going to be installing
This number is the spacing you will be installing the posts at
Example:
Fence length 41.7mtrs
Divided by 2.4mtr bays = 17.375 bays
Round this up to 18 bays
41.7 (Fence length) ÷ 18 (bays) = 2.32mtr post spacing
You can double check this by multiplying 18 × 2.32 = 41.76metres
(This number shouldn’t be any more than 15cm different to the fence length)
Using the post spacing number you have just worked out, you can now start marking the post spacings on the ground using spray mark
Mark a line on the ground at the centre of each post
It is best to do these dimensions as running dimensions, to avoid creep in the post spacings
Once the post spacings are marked, you can now go back over these lines and mark a large cross at the intersection of the post centre and the stringline (make sure the stringline is straight, and not getting blown by the wind or stuck on anything)

Tip: Make these crosses big - spray mark is not expensive, and it will be a lot easier to see the marks and remark them if they get accidentally scrubbed out by machinery, rain or people.
Step 4: Drill the holes
Use an excavator or other means to drill the holes (standard depth is 600mm, gate posts may need to be deeper)
Ensure holes are drilled straight and plumb
Clean out any loose dirt with a shovel
Auger size guide (this is a guide only):
150mm posts – 300-400mm Auger
200mm posts – 400-500mm Auger
250mm and 300mm posts – 600mm Auger

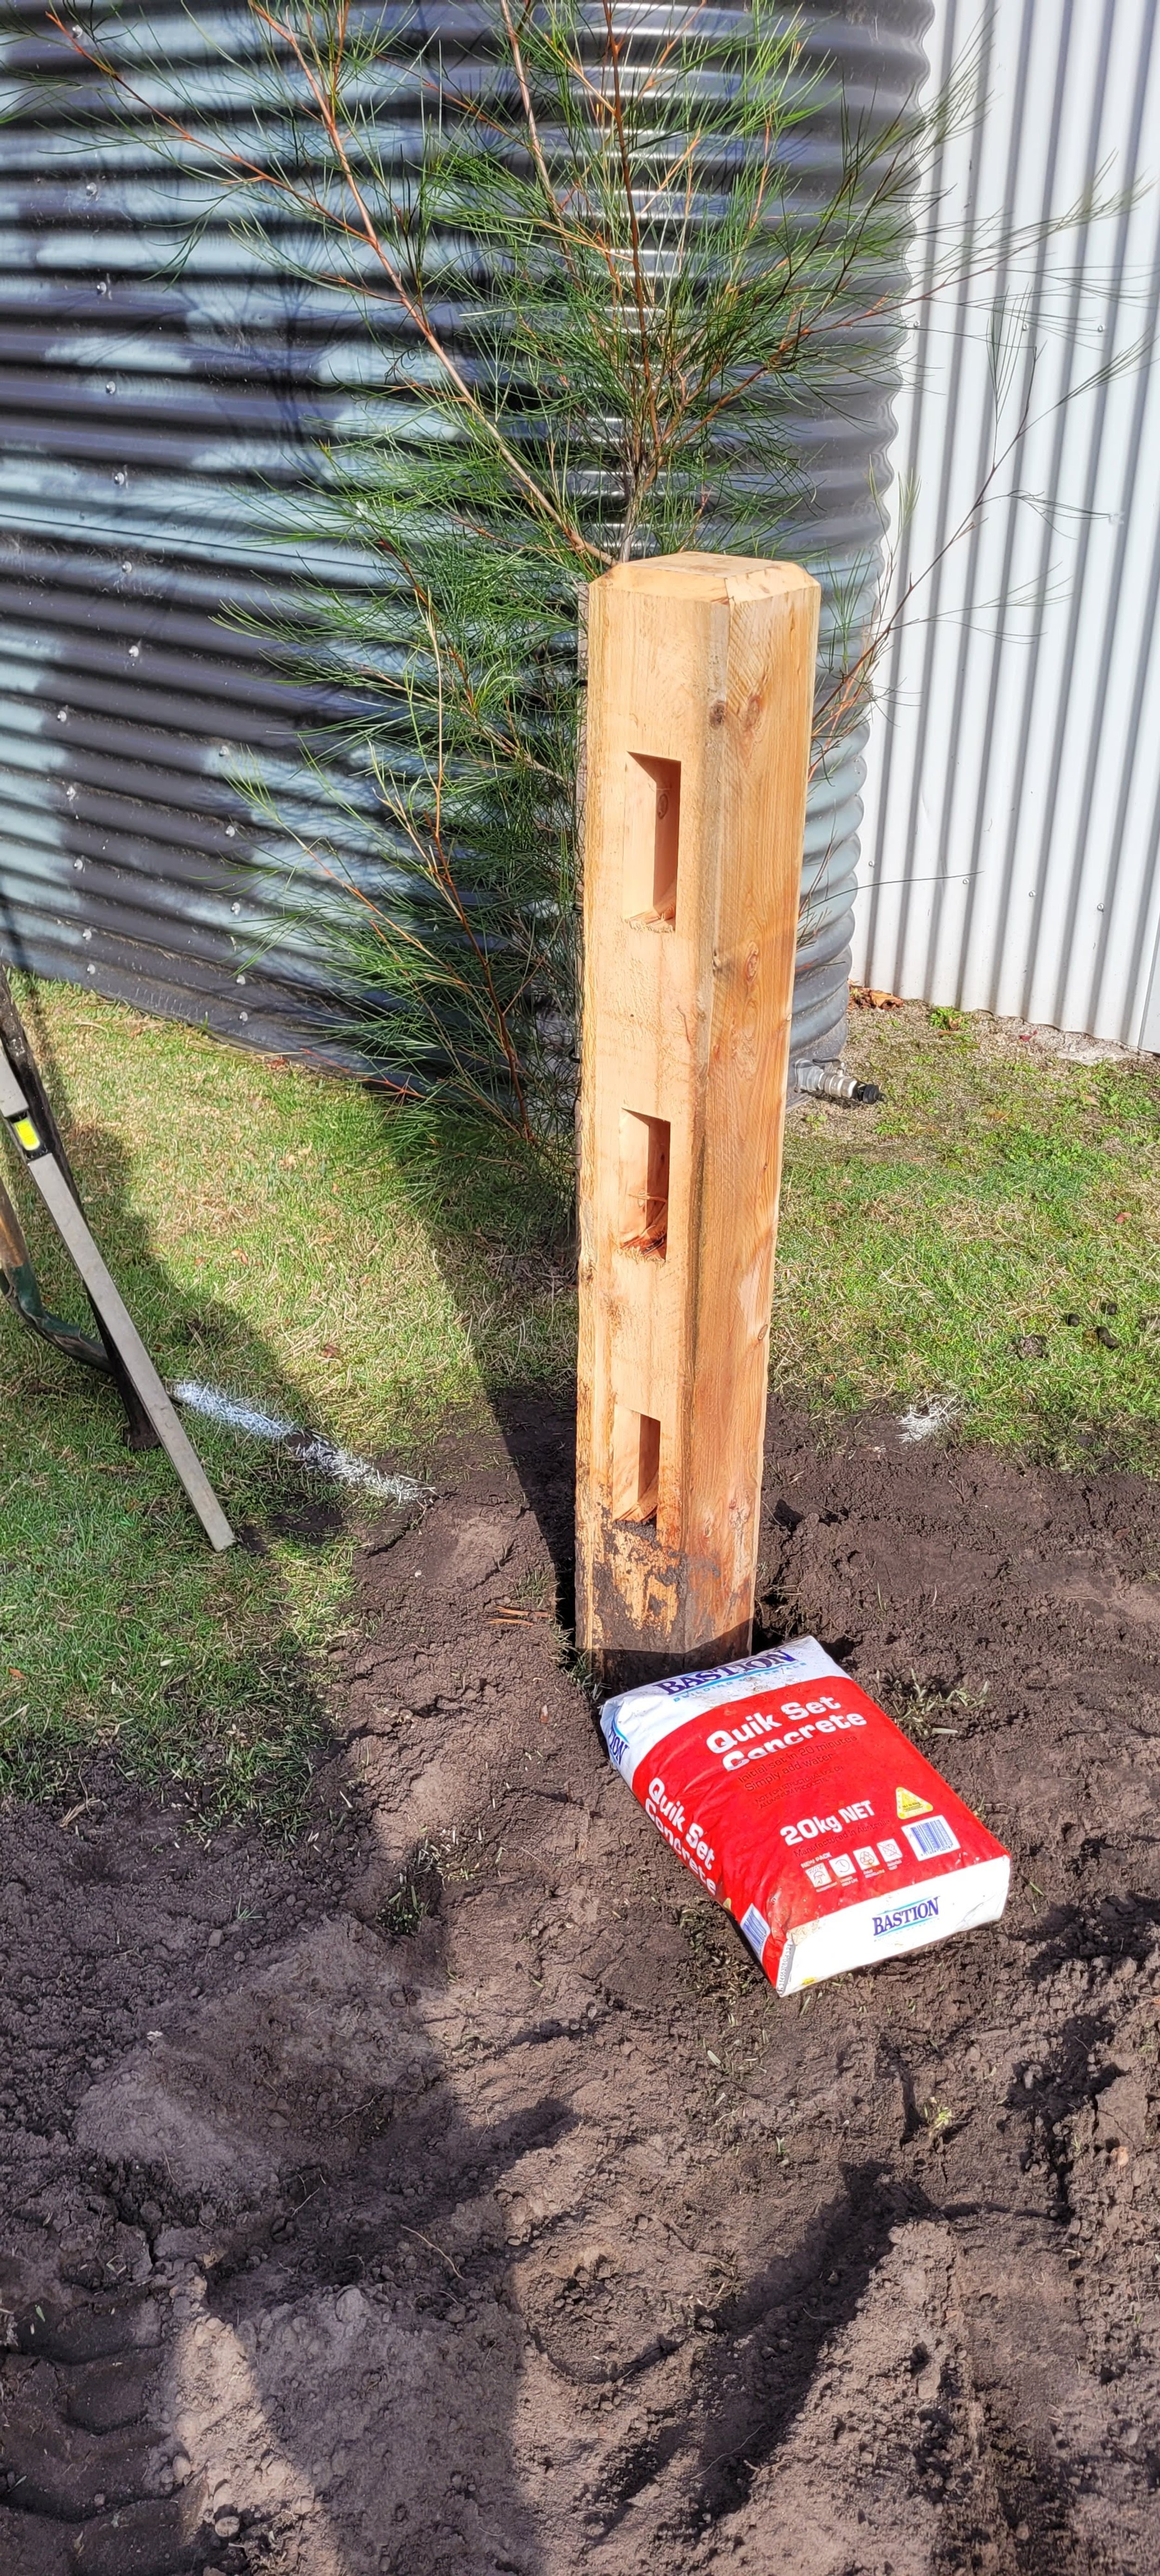
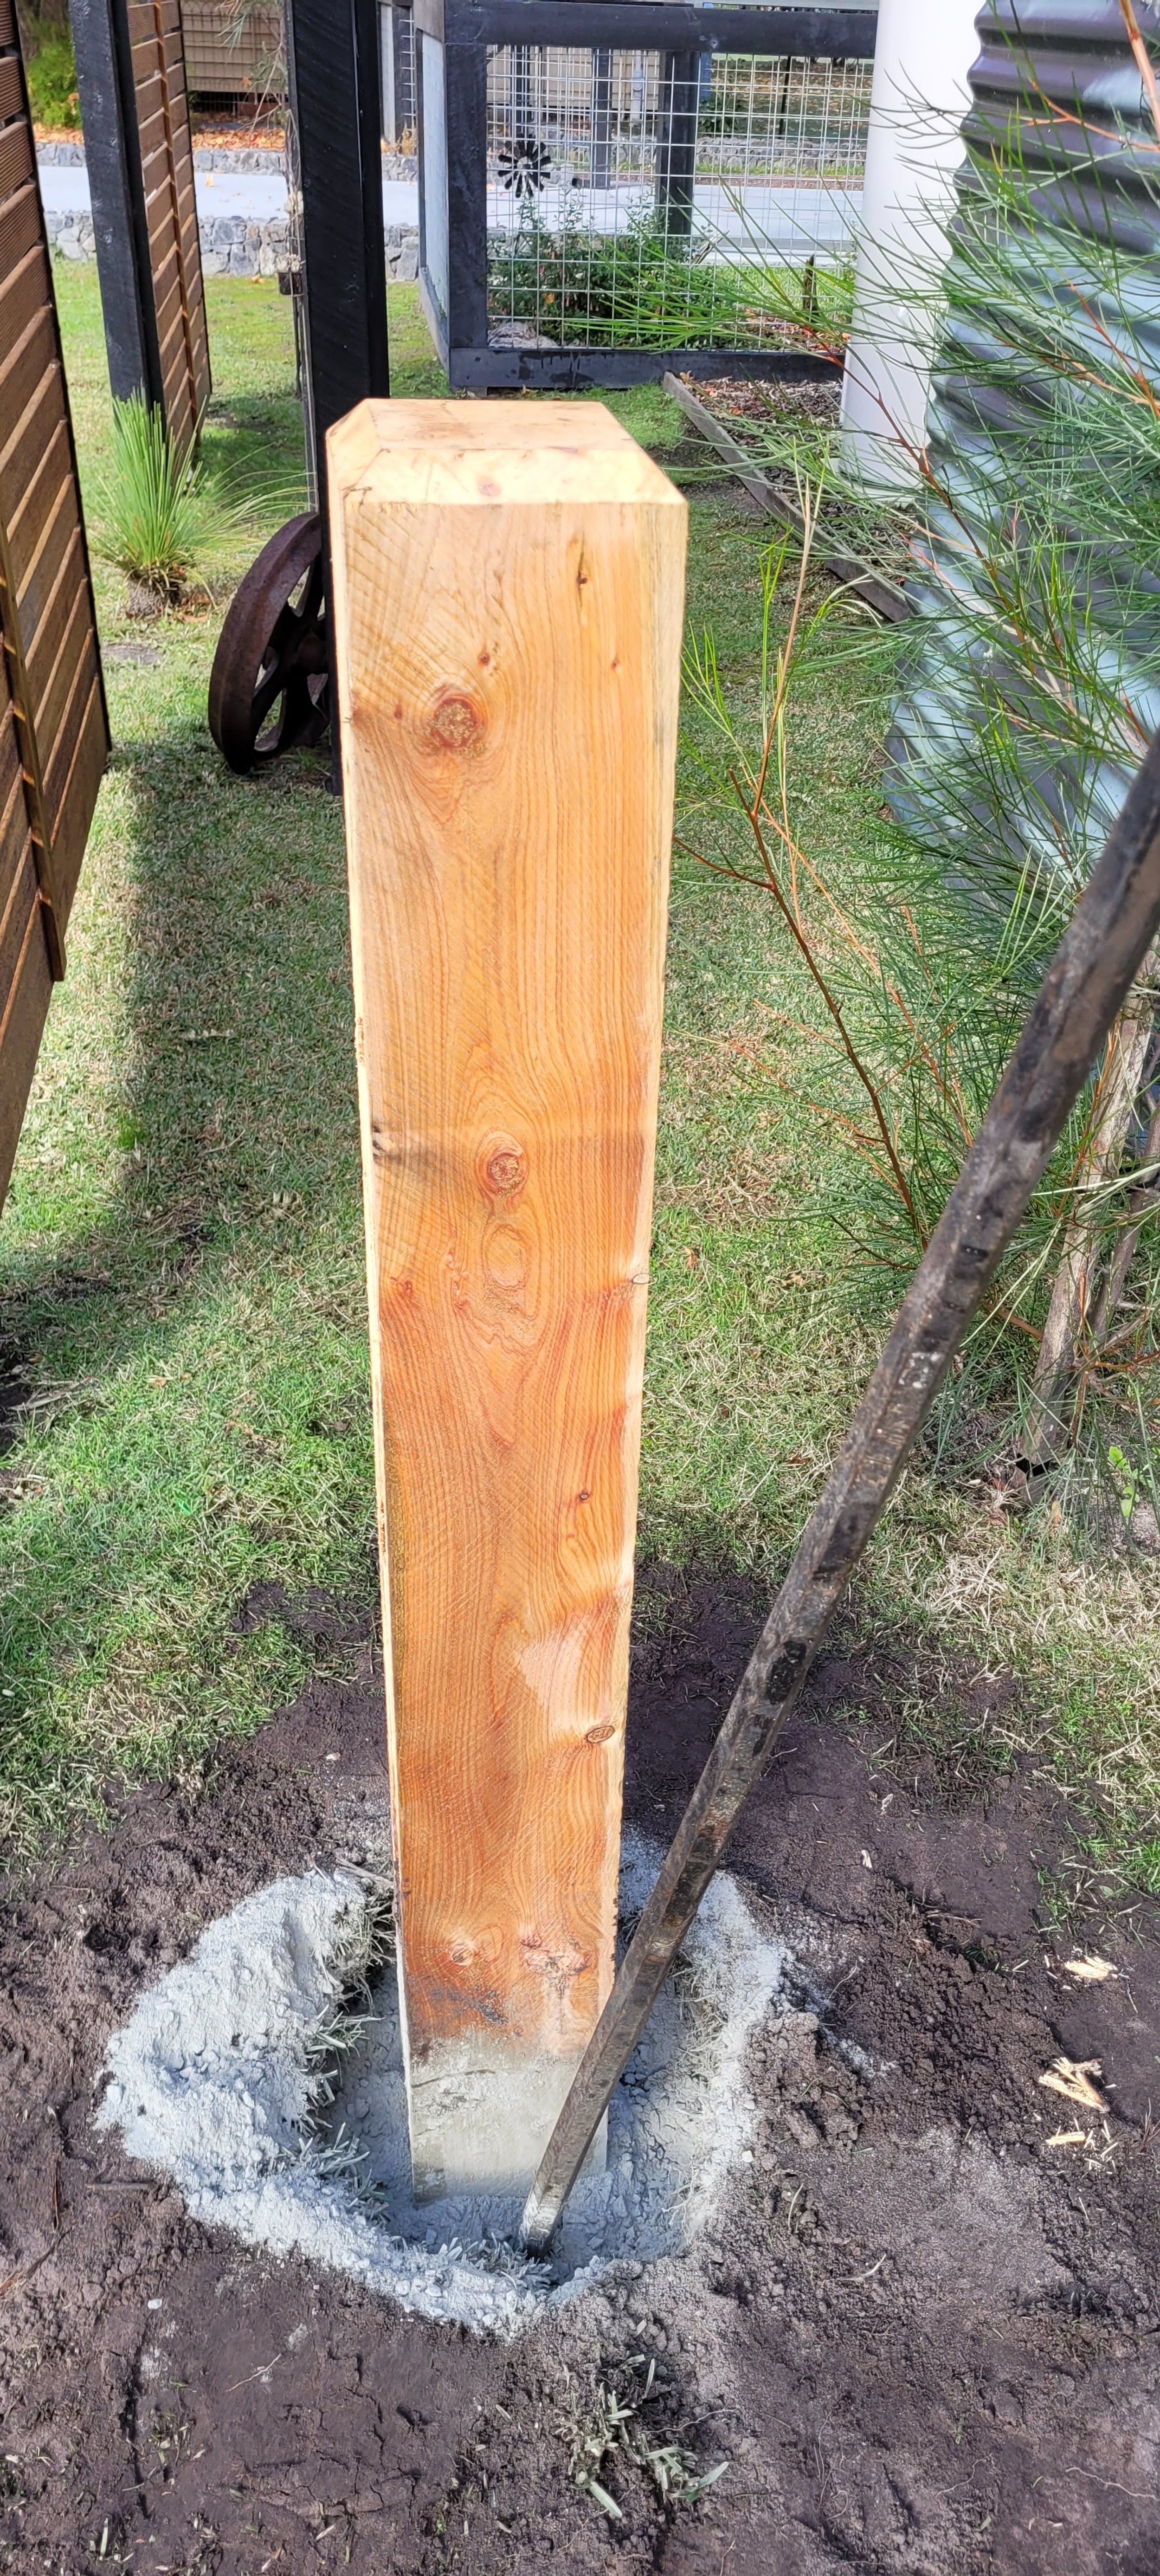
Step 5: Install the end posts
Check the post is centered in the hole and lines up with the paint mark from the mark out step
Unless otherwise stated the posts need to be approx. 1200mm out of the ground, so measure the height of the posts, then lift the post up and pack dirt underneath to raise it, or dig the hole deeper to lower it
Once the post height is right you can now go ahead and set the post:
Shovel dirt around the post so the hole is half full of dirt.
Using the flat end of a crowbar, tamp this dirt down so it is firm.
While tamping hold the post as level as possible, or have a helper hold the post.
Add more dirt and repeat this process, ensuring the post is level.
As you fill the hole up, the post should get firmer.
Continue adding dirt until the hole is approx. half full with tamped dirt.
Add 1 bag of Bastion or equivalent rapid set concrete evenly around the hole.
NOTE: Add concrete mix dry, and do not add water at this stage.
Spread the concrete around evenly, and use the sharp end of the crowbar to tamp this down (this allows the small rocks in the concrete to lock together and should make the post feel very firm).
Next, add water to the hole. Fill the hole up with approx. 4-5 litres of water.
Move onto the next post and let the water soak into the concrete.
Repeat this process for the post at the other end of the fence.
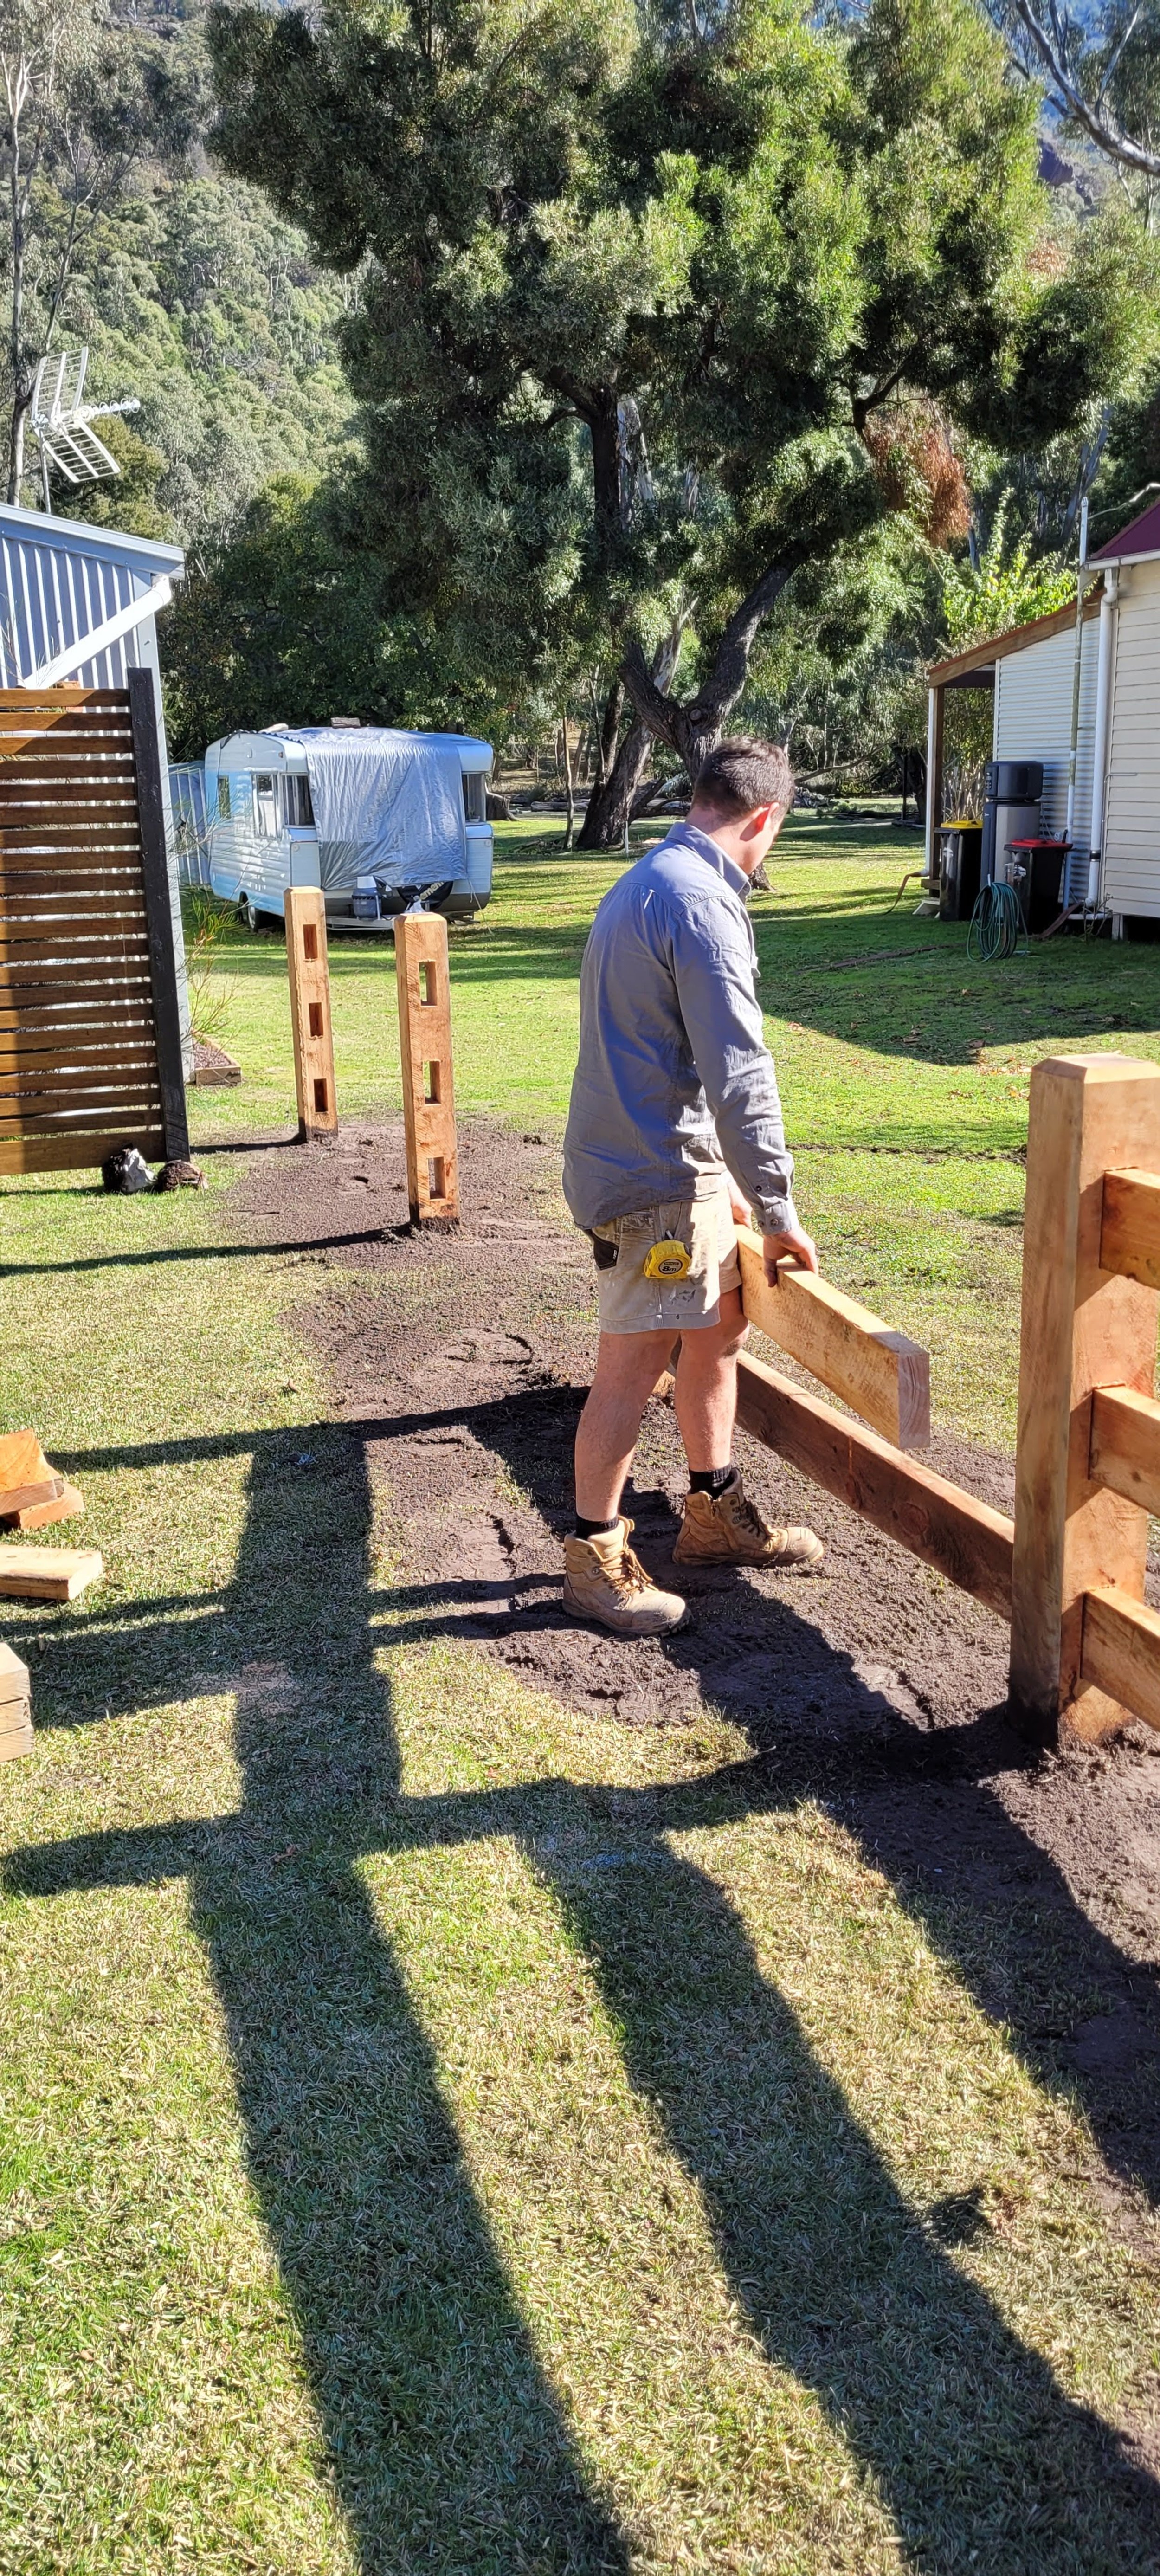
Step 6: Set up a stringline between the two end posts
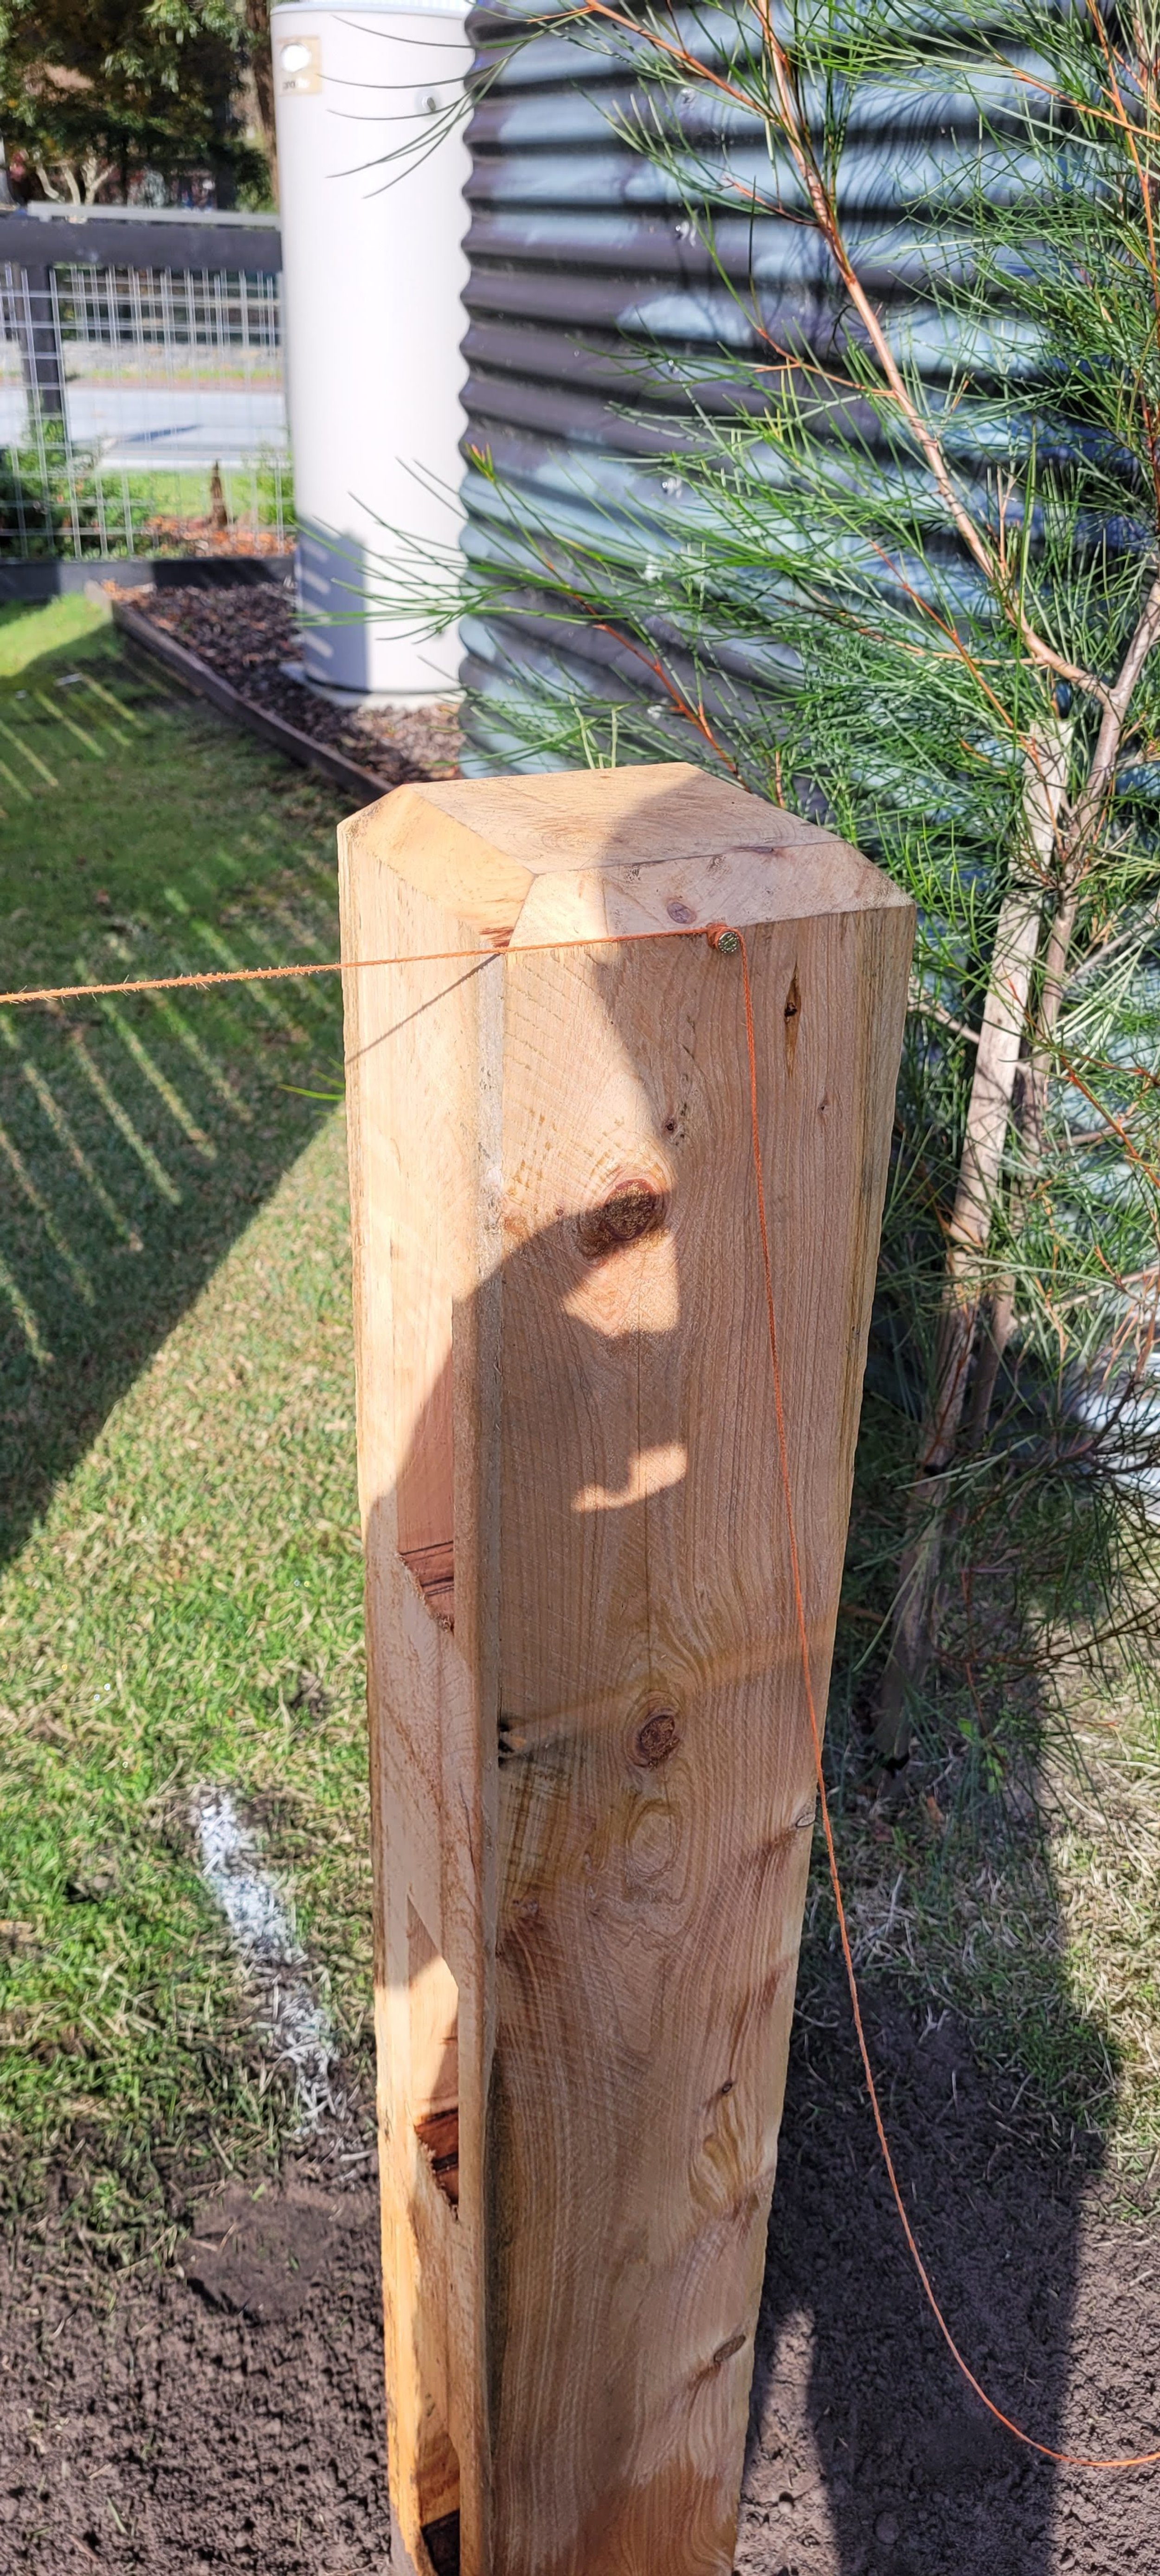
Step 7: Install the remaining posts
Check there is no sag in the stringline. If there is, an intermediate post will need to be installed to hold the stringline up straight (a sagging stringline will result in a sagging fence.
An intermediate post may also need to be installed if the fence is going over undulating ground or changing direction at all.
Using the process as outlined in Step #5, install all remaining posts, ensuring all posts are lined up to the stringline, and are level and plumb.
Step 8: Clean up around posts
Once the posts are installed, now is the best time to clean and rake around the posts to it is all tidy. This will make the next steps easier and safer.

Posts installed and the area tidied up for the next step.
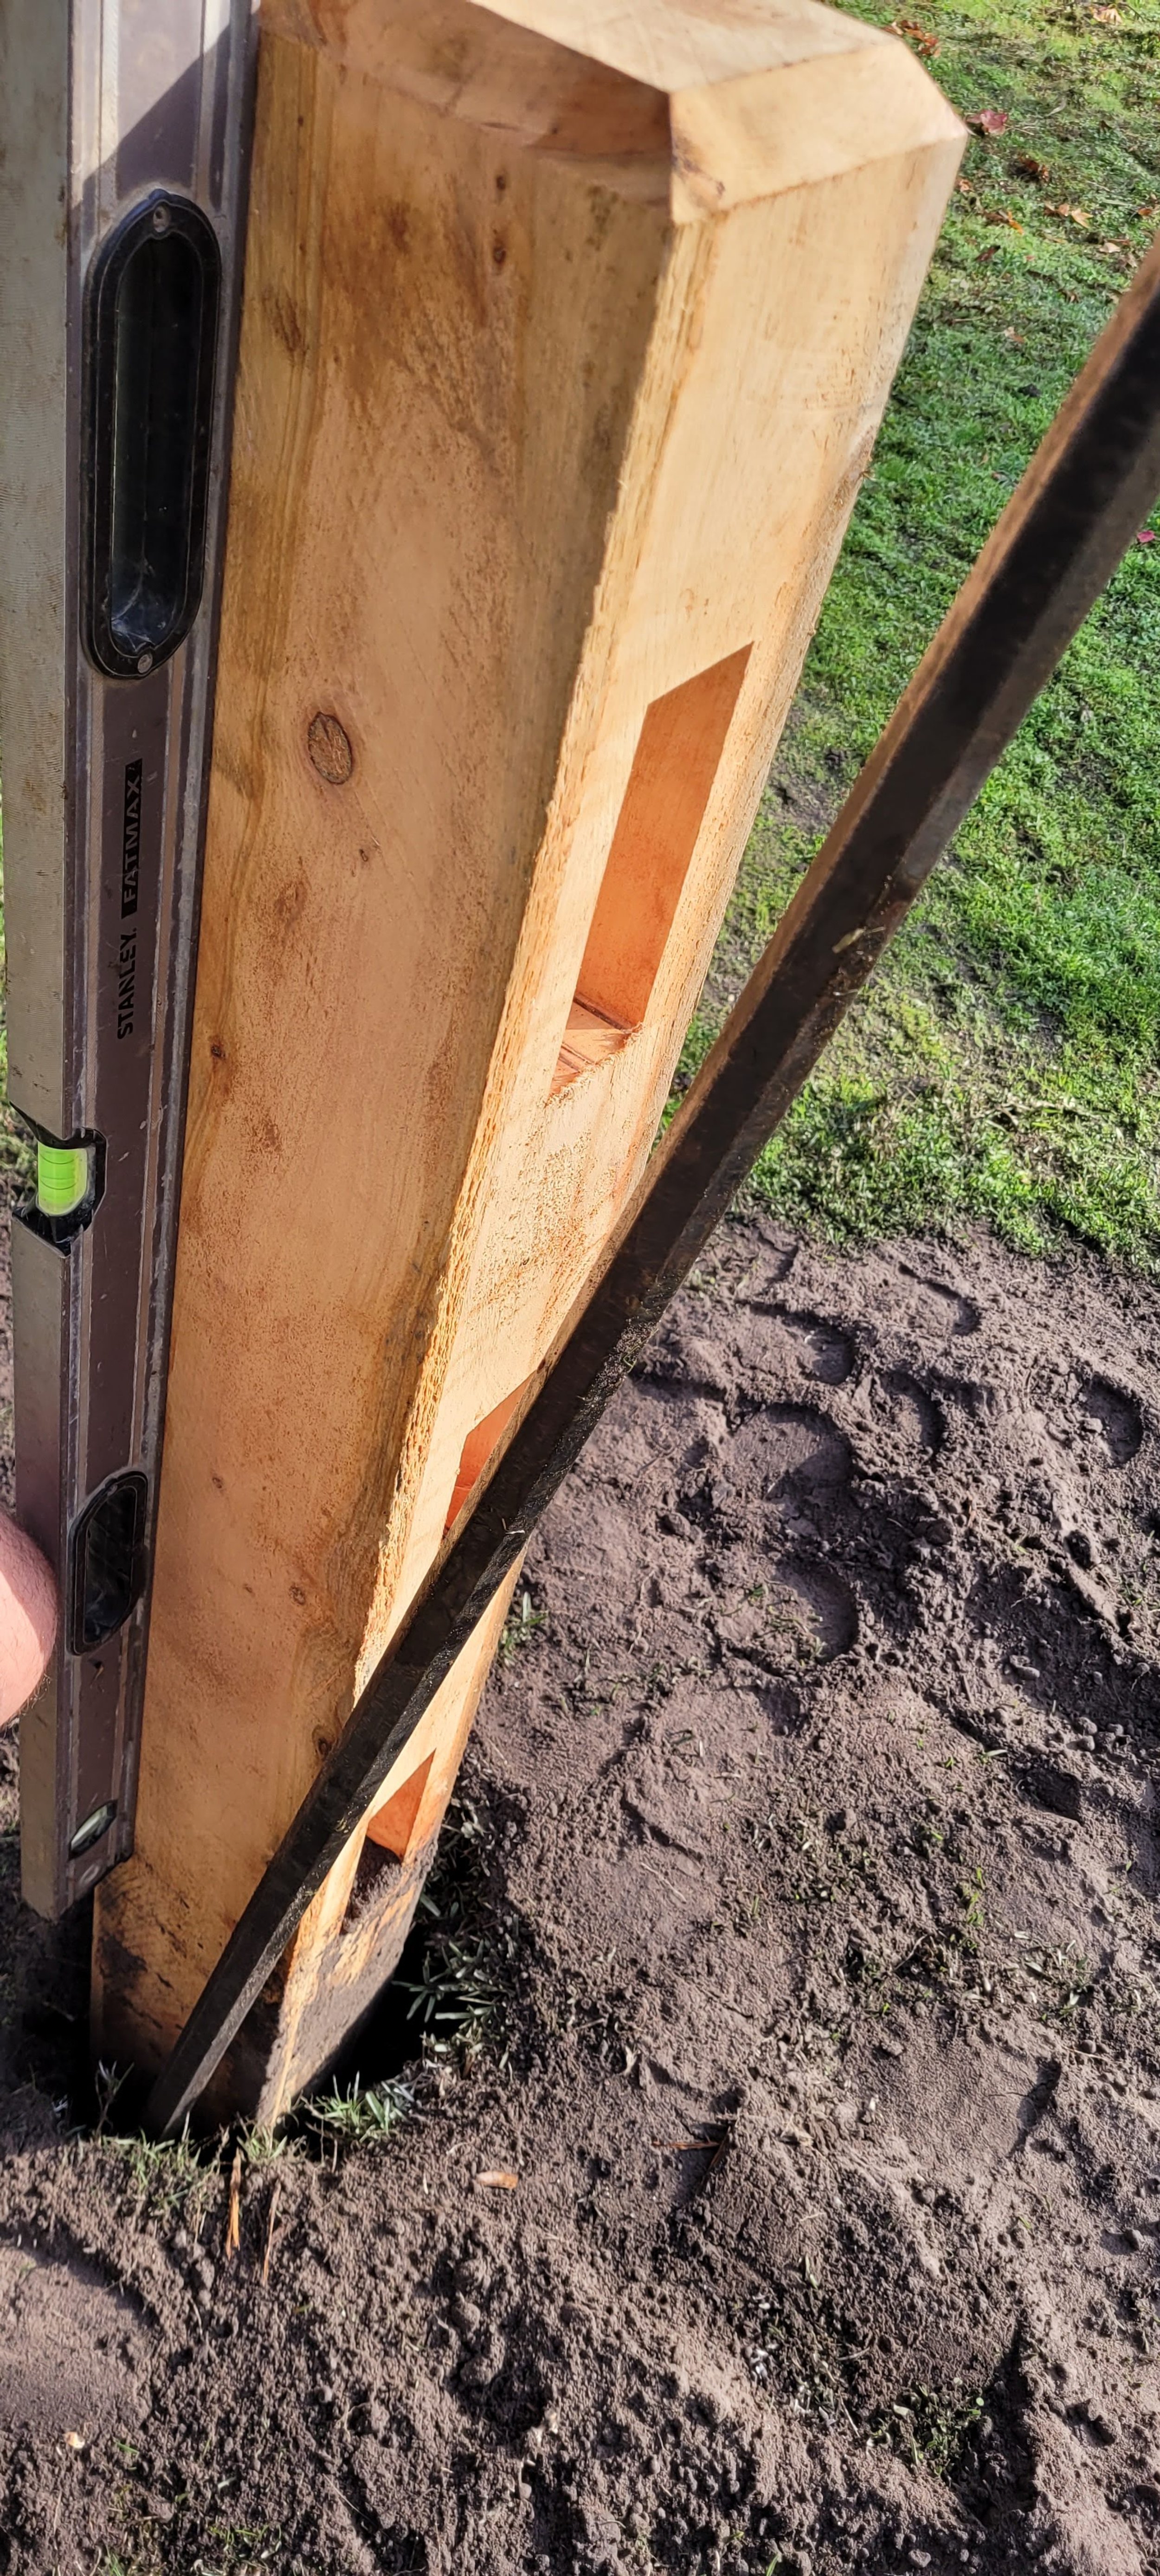
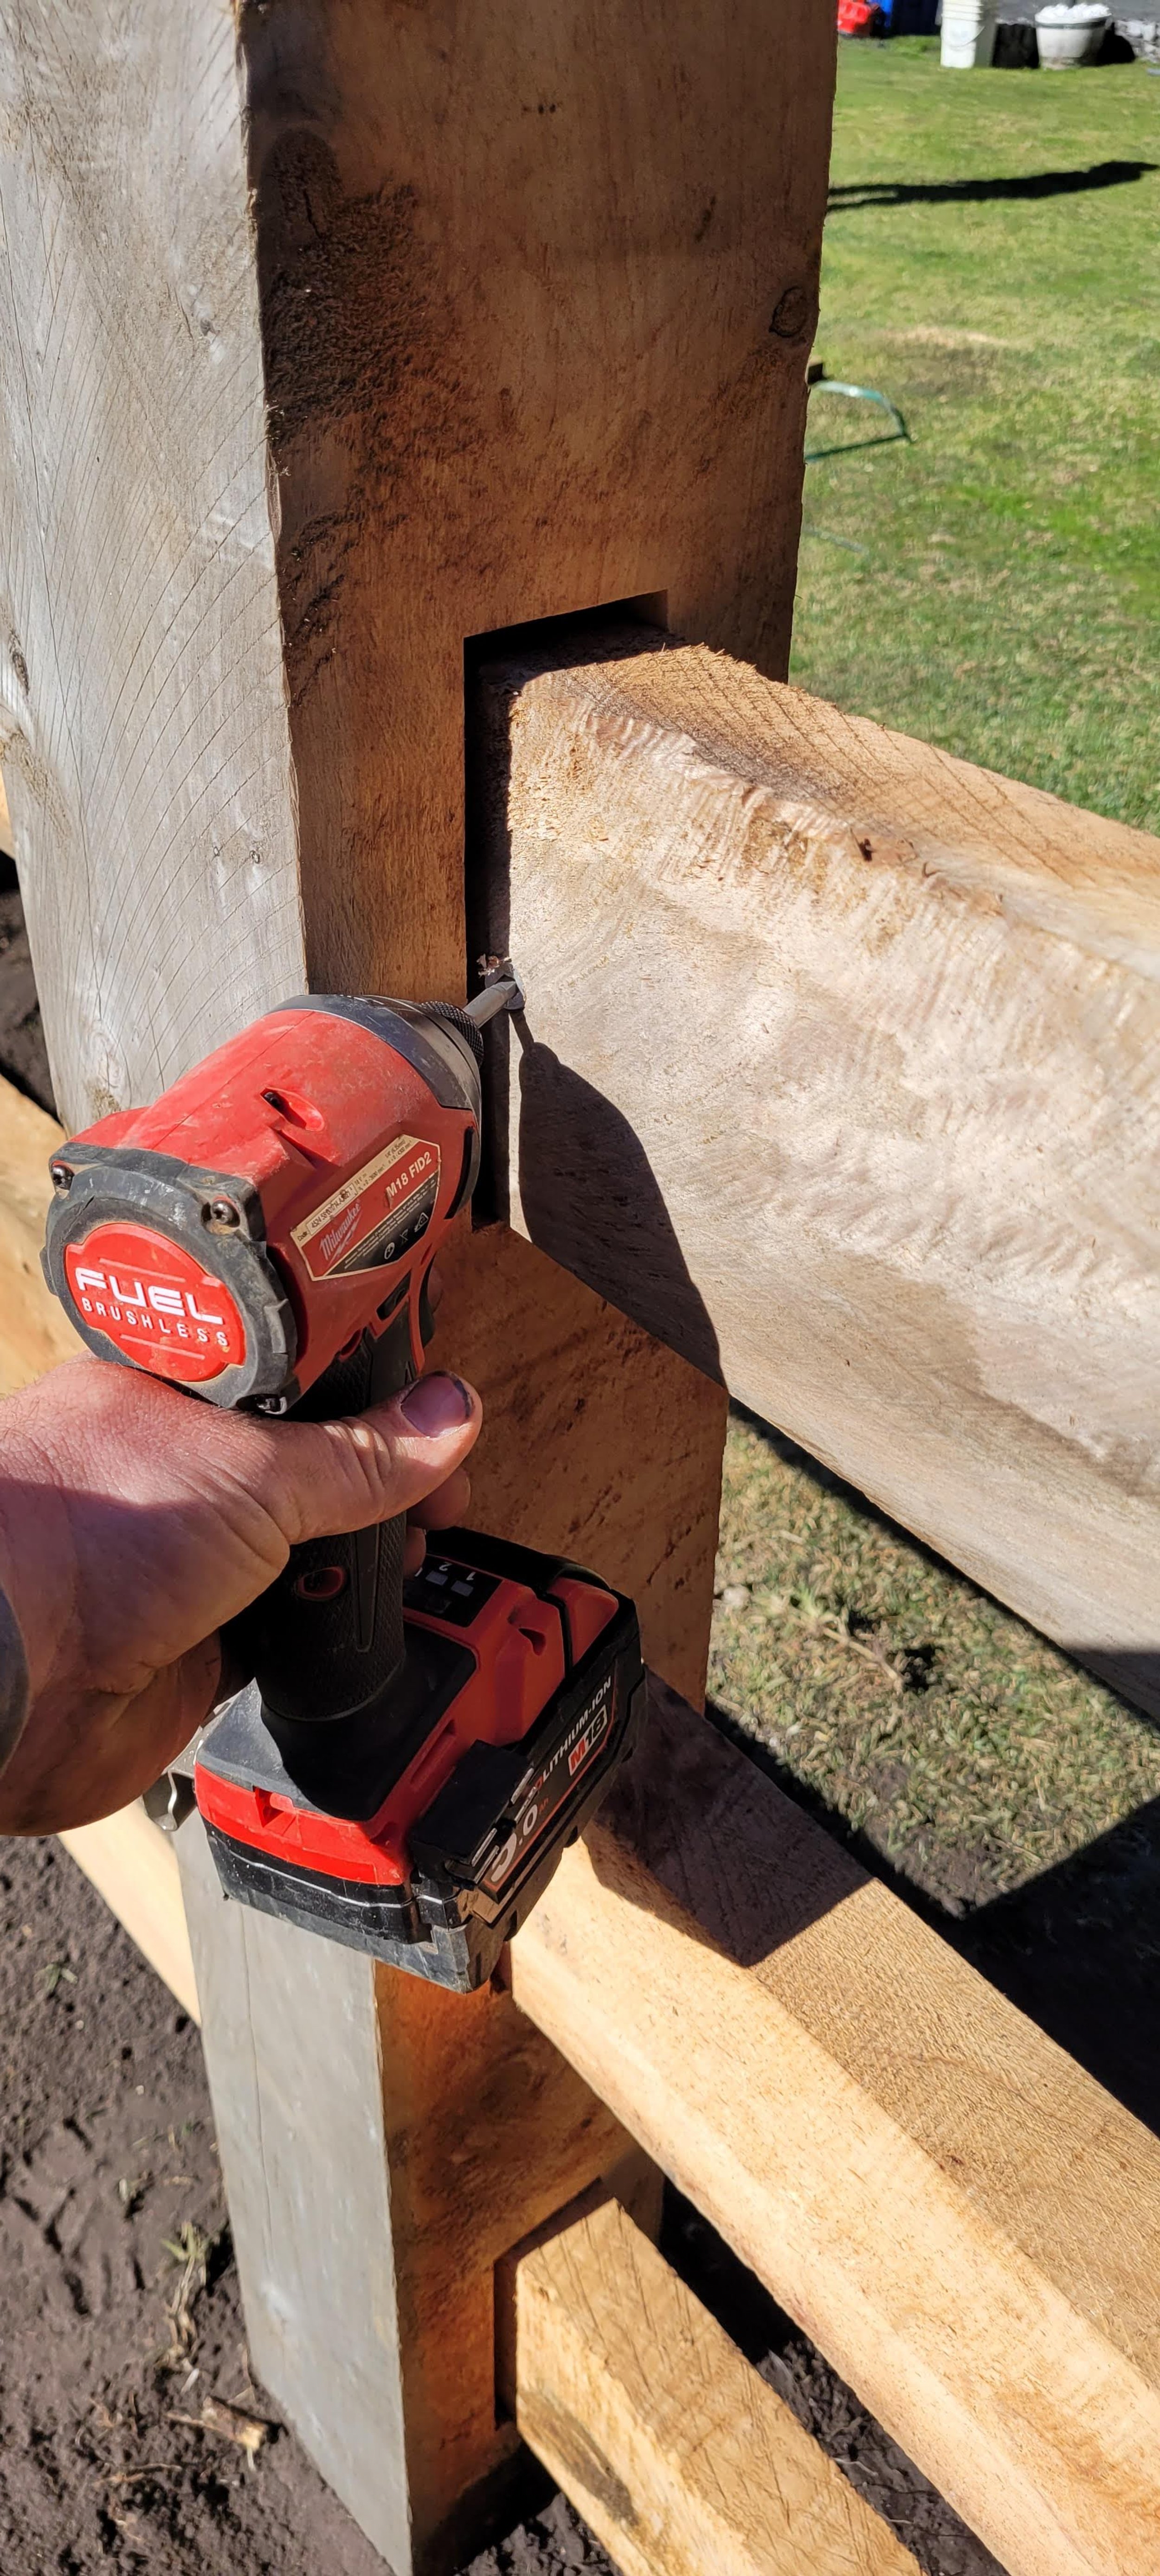
Step 9: Fit the rails
Measure and cut the rails for the first bay of fencing, ensuring the rails finish halfway through the post.
The rails can be inserted by sliding them through the left-hand post and pulling them back into the right hand post, or vice versa if working from right to left.
The last rails can be installed in two ways:
Leave the 2nd last post loose so it can be pushed around to fit the rails, then once the rails are in place, you can concrete this post, OR;
Cut the last bay of rails slightly shorter so they fit, and then fix the last two bays of fencing with screws from the back of the rail, as shown below.
Step 10: Admire your new fence
Congratulations! Your post and rail fence is now ready for coating or oiling, or you can leave it to naturally age to a silvery-grey.

